How to Create an Order in Sellercloud
Creating an individual order in Sellercloud is simple.
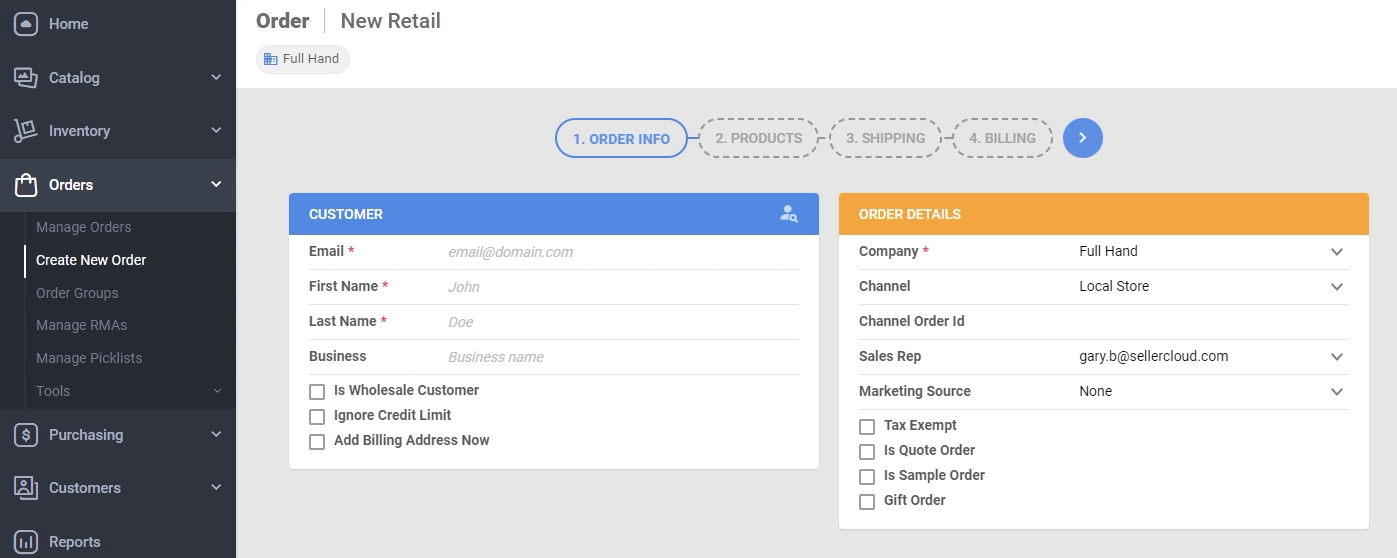
We’ll go to the Orders Module and click on “Create New Order” to pull up the “Order Creation” wizard.
Start by adding the Order Info, like your Customer and Order Details. Existing Customers can be searched for using the “Search Customers” menu.
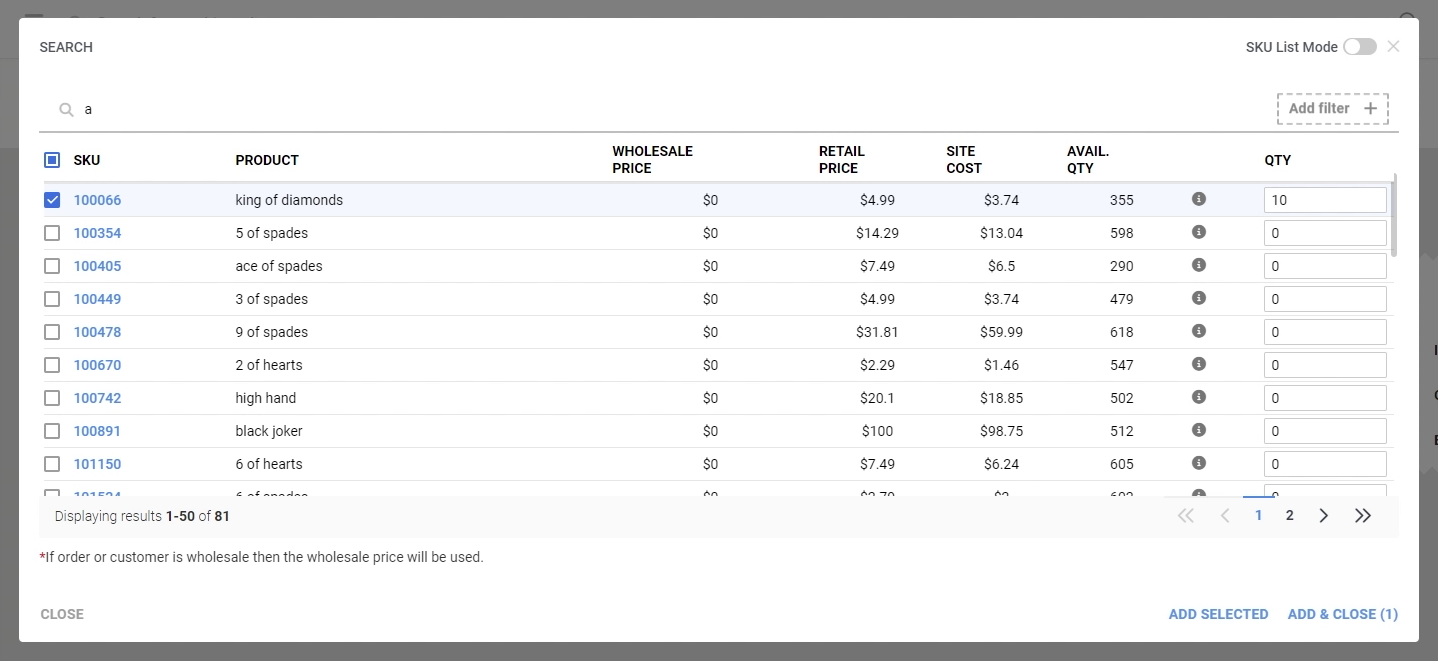
After the Order Details are filled out, you can move to the next tab and begin adding Products. Products can be added individually by clicking on “Add Products +” and searching for SKUs or by uploading a file with the SKUs and quantities desired.
Once the Products have been added, we can move on to Shipping and fill out the Shipping information.
You can verify addresses before creating the order and calculate shipping costs if you would like to apply Customer Fees to the order.
To calculate shipping costs, click the “$” icon in the Shipping Details menu to open up the rate calculator.
Next, we move to Billing, where you can copy the Shipping Address by toggling the “Same as Shipping” switch or add a different Billing Address before proceeding to build the new order.

Clicking the “green flag” icon will build the order, and from there, you can either “View Order Details” or “Proceed to Payment”.
“View Order Details” will open up the detailed page for the newly created order.
“Proceed to Payment” will bring you to the “Receive Payment” page, where you can process a payment in Sellercloud.
Sellercloud integrates with Stripe, Cardknox, Paypal, etc., for payment processing.