How to Ship My Orders With Shipbridge
There are two main ways to ship your orders when using Shipbridge. You can ship orders manually or by using our Scan & Ship feature.
To ship orders manually, let’s start by pulling up the desired order to ship in Shipbridge.
You can use the filters provided in the toolbar to sort for orders or simply type in an Order ID to pull up the desired order to ship.
Once you have the order, you can check the box all the way to the left and right-click to pull up the “Rate Calculator”.
Select “Calculate Rates” from the menu to open the “Rate Calculator” and select the service from the list provided that you would like to ship with.
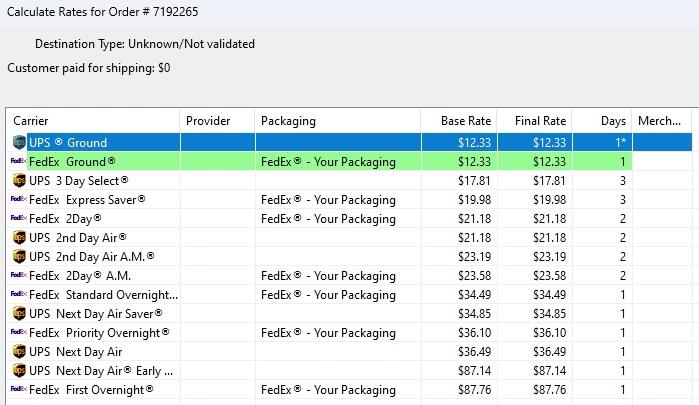
After you have selected the desired service, you can click “Ship and Print Labels” at the top to print your shipping labels.
As tracking is generated in Shipbridge, Sellercloud is updating the sales channels with the tracking information and marking orders as shipped.
To automate the shipping process, you can use our “Scan & Ship” tools to scan SKUs and find related orders.
For Single Item Orders, when using “Scan & Ship,” Shipbridge will find a related order and generate a shipping label based on the settings you choose.
You can choose to automatically select the cheapest rates to ship by the promised date.
You can set shipping preferences in the system for specific package types and shipping services.
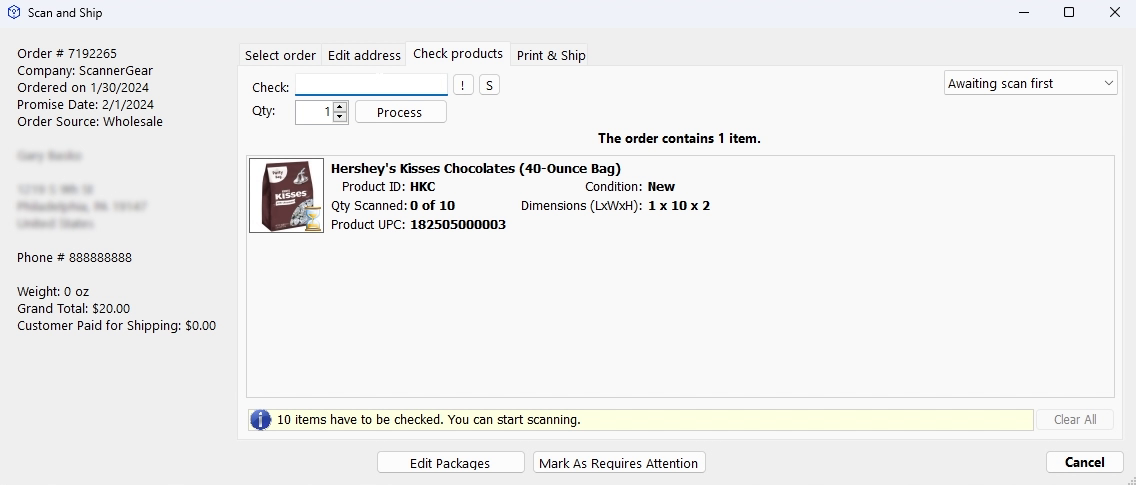
For Multi-Item Orders in Shipbridge, when scanning an SKU, a related order will pop up with a screen prompting your warehouse worker with the other items that need to be sorted into that order before a shipping label can be generated.
Scan the required items into the order to bring you to the next screen, where you can add weights and dimensions for the order.
With weights and dimensions, we can now calculate the cheapest rates to ship your order.
“Scan & Ship” can be used to capture serial numbers at the time an item is being packaged and shipped. Serial scans can be required on an SKU level for shipping labels to be generated.