How to Update Inventory Individually in Sellercloud
To update inventory on a single SKU, go to your “Inventory Module,” open your “Manage Inventory” page and, just like with your catalog, use the default filters and custom filters to sort for your SKUs. Alternatively, you can search for your SKU using the universal search bar.
Once on the detailed page of your SKU, go to your Toolbox and search “Warehouse”.
In the Warehouse Tab, you will see “General Inventory Stats” and be able to make several different inventory adjustments based on the Warehouse.
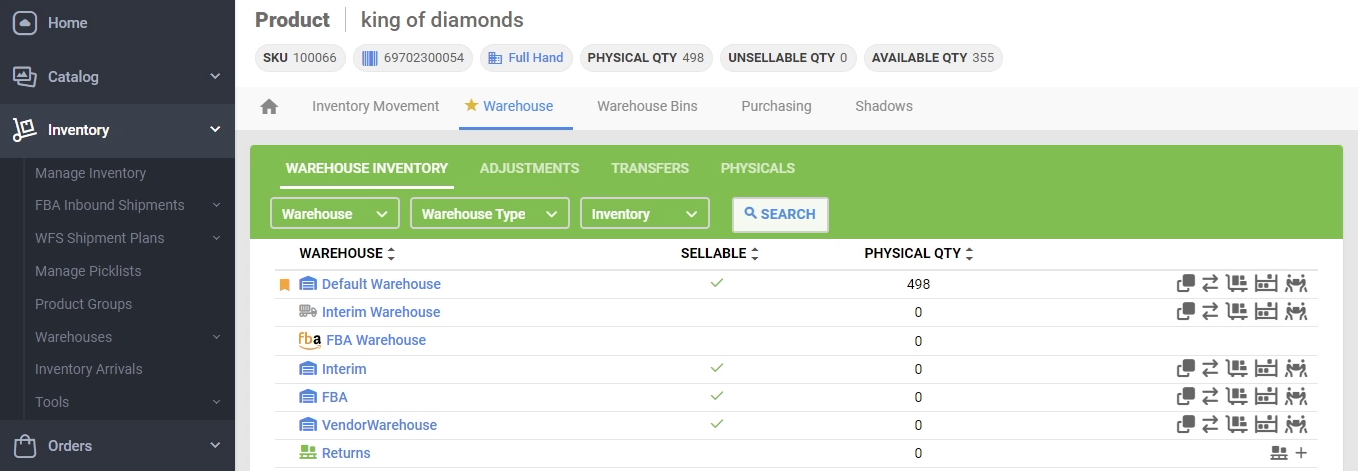
What do these icons mean to me:
 Clicking on this icon will pull up any related Shadow SKUs.
 Clicking on this icon will open up a menu to add the inventory you would like to transfer and select the Warehouse you would like to transfer to.
 Clicking on this icon will allow you to set the “Quantity to Adjust” and then select the “Adjustment Type” (Add or Subtract) to adjust the inventory for that SKU in that Warehouse.
 Clicking on the icon will open a menu and allow you to set a “Physical Inventory” in that Warehouse for that SKU. Setting Physical Inventory is normally used when starting with Sellercloud.
 Clicking on this icon will allow you to view the inventory movements in that warehouse for that SKU.