Allocating Inventory
Sellercloud allows you to allocate inventory awaiting to be received on your Purchase Orders in a number of ways. The inventory calculation Sellercloud uses to track this inventory is called “Quantity On Order.”
You can allocate inventory on a PO to an Order
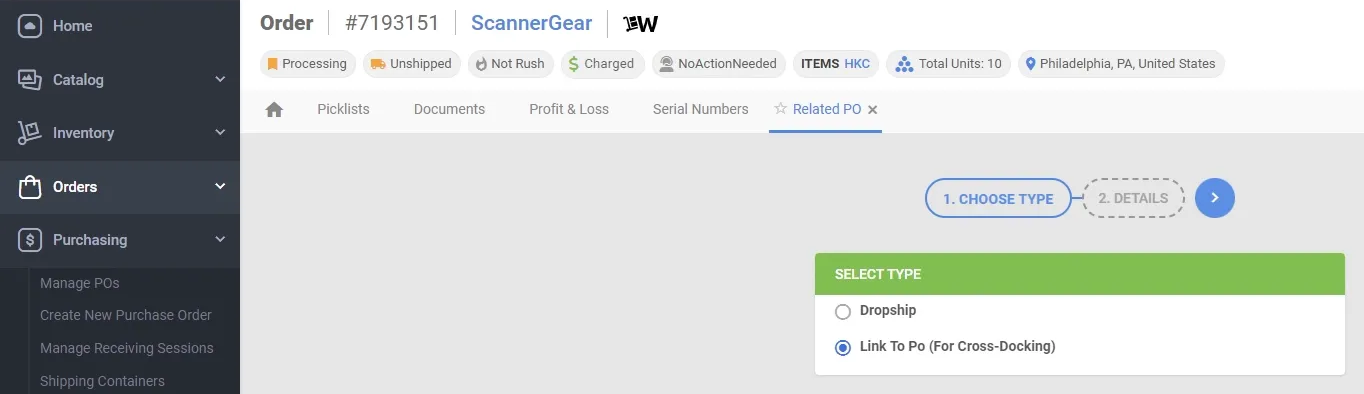
To allocate inventory on a PO to an Order, go to the desired Order’s detailed page and select “Link Item(s) to PO” from the “Actions” button dropdown.
From here, you can choose to “Dropship” the Order, or in this case, we will choose “Link to PO(For Cross-Docking)” as the type and then move to the “Details” tab.
In the “Details” tab, we can select the SKUs from the Orders you want to “Link To PO,” type in the “QTY FOR PO,” and then click the “links” icon to “Link To PO.”
This will open a window where you can choose to either link the SKUs to an “Existing PO” or, if you would like, create a “New PO” for the Order.
You can allocate inventory on a PO to a FBA Inbound Shipment
To allocate inventory on a PO to an FBA Inbound Shipment, go to the desired PO’s detailed page and select “Sync To FBA Inbound Shipment” from the “Actions” button dropdown.
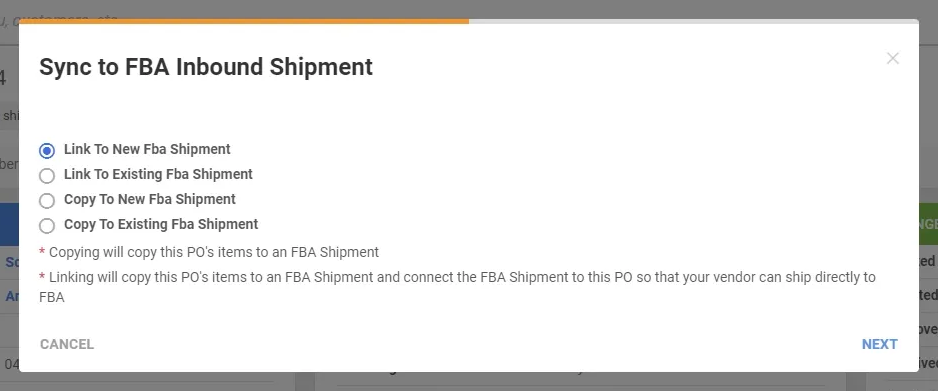
This will open a menu where you can choose to either Link or Copy the PO to a New or Existing FBA Shipment.
Copying will copy this PO’s items to an FBA Shipment
Linking will copy this PO’s items to an FBA Shipment and connect the FBA Shipment to this PO so that your vendor can ship directly to FBA
Linking to a New FBA Shipment will create a brand new FBA Shipment Plan for you to manage in your Sellercloud account in the Inventory Module.
Linking to an existing FBA shipment will bring you to a tab where you can search for the FBA Inbound shipment you want to link to inventory waiting to be received on the desired PO.
You can allocate inventory on a PO to your channels
Sellercloud gives you the option to use your “Quantity On Order” inventory as part of your “Available Quantity” being sent to your sales channels by adding “Pre-sell Quantity.”
The Inventory Pre-sell feature is controlled by the Enable PO Pre-sell Quantity option, which is available under Client Settings in the Purchasing section(Advanced). Once enabled, the relevant fields will appear in the Purchase Order details.
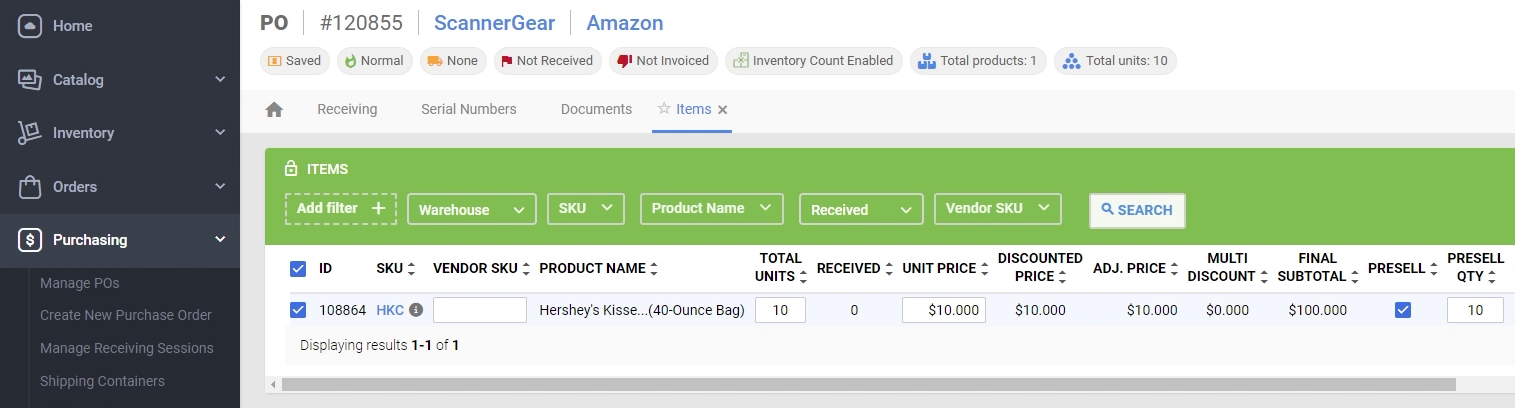
In the desired PO’s detailed page, go to the Toolbook and select “Items” from the drop-down.
Now click the “pencil icon” in the top right of the “Items” window to edit, checkmark the SKUs you want to “PRESELL,” type in the “PRESELL QTY,” and click the green “checkmark” icon to save the PO.